Pressure-treated wood is one of the most durable materials available for outdoor construction. It resists rot, shrugs off insects, and handles the kind of punishment that San Antonio summers dish out year after year. But durable does not mean maintenance-free, and that distinction catches a lot of homeowners off guard.
Without a proper finish, treated lumber will gray, crack, and splinter well ahead of schedule. Once that surface degradation sets in, no stain coat is going to undo it. The time to protect treated wood is before it shows signs of wear — and doing it right the first time makes every subsequent maintenance cycle easier.
This guide covers the full process from start to finish, including the mistakes most people make and how to avoid them.
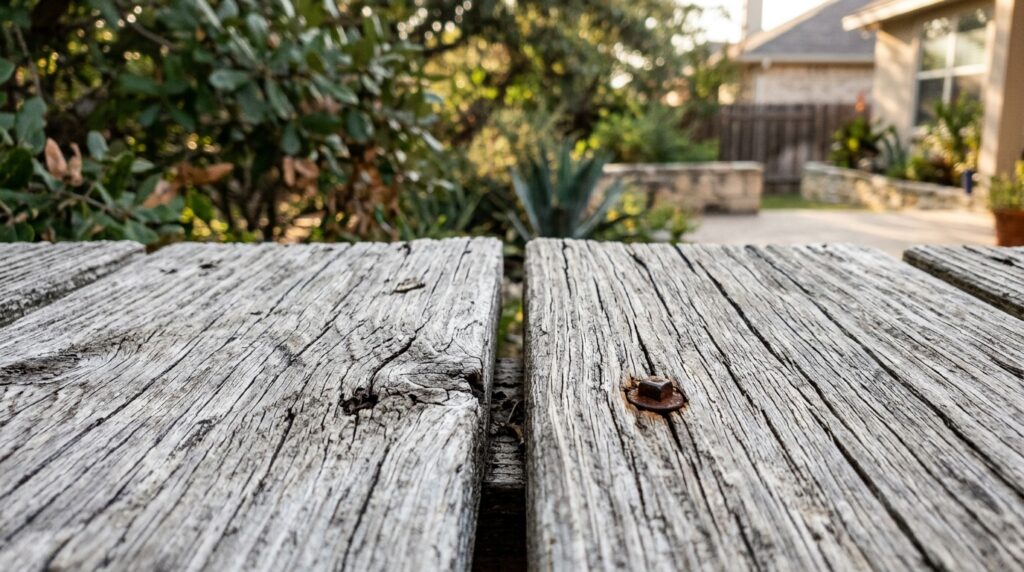
A lot of homeowners assume that because treated lumber is chemically protected, it does not need much else. That assumption leads to a lot of prematurely grayed decks. The preservative compounds in treated wood guard against biological threats — rot fungi and insects — but they offer almost nothing in the way of UV protection or resistance to moisture cycling.
Exterior wood expands and contracts with every shift in temperature and humidity. Over time, that movement opens small cracks along the surface. Water works into those cracks, the wood swells, and the openings widen further. In San Antonio’s climate, where intense summer sun alternates with periods of heavy rain, this cycle runs harder and faster than in milder regions.
A quality stain slows moisture absorption, blocks UV degradation, and keeps the wood surface stable through all of it. Without one, even well-built treated wood structures start showing their age within a few seasons.
The most common mistake in staining pressure-treated wood is starting too soon. Treated lumber is saturated with water-based preservatives when it leaves the manufacturing facility. That moisture has to escape before the wood surface can accept any finish — and applying stain over wet wood is one of the fastest ways to guarantee a finish that peels.
Kiln-dried pressure-treated lumber, labeled KDAT at most suppliers, can sometimes be ready within a few weeks. Standard boards from a home improvement store may need anywhere from six weeks to several months of outdoor drying before they are genuinely ready.
Skip the guesswork by running a simple field check. Sprinkle a few drops of water onto the wood and watch what happens.
Test in multiple spots, including near the end cuts. End grain releases moisture more slowly than the face of a board, so a board that passes the test in the middle may still fail at the ends. All sections need to pass before work begins.
Even freshly purchased treated wood should be cleaned before staining. Boards pick up handling residue, mill scale, and surface dust during transport and storage. Older wood that has been exposed to weather will also carry a layer of surface gray — dead wood fiber caused by UV breakdown — that prevents even stain penetration if it is not removed first.
For lightly soiled boards, a dedicated deck wash mixed with water and scrubbed in with a stiff-bristle brush handles the job. Work along the grain, rinse thoroughly, and allow the wood to dry completely — at least 48 hours in dry conditions, longer when humidity is high.
Weathered treated wood benefits from a two-step approach. Start with a deck cleaner to remove dirt, mildew, and surface grime. Follow with a deck brightener — a mild acid solution that opens the wood grain and restores the surface pH. Both steps matter. Without the brightener, stain will not penetrate evenly and adhesion across the surface will be inconsistent.
Rinse thoroughly after each product and allow full drying time before proceeding.
Stain locks in whatever condition the wood is in at the time of application. Addressing structural and surface issues before finishing is far easier than trying to repair them after the fact.
Walk the entire structure and look for:
Replace boards that have gone soft. Predrill and countersink replacement fasteners to minimize surface splits. Fill minor cracks with an exterior-grade wood filler formulated for treated lumber, sand smooth once dry, and address any remaining rough areas before opening the stain can.
Not every deck stain performs the same way on treated lumber. The categories are worth understanding before purchasing.
A penetrating oil stain soaks into the wood fiber rather than forming a coating on top of it. Because treated lumber absorbs products differently than untreated wood, oil-based formulas tend to bond reliably and resist peeling over time. Semi-transparent versions in this category protect the wood while still allowing the natural grain to show through. For most pressure-treated decks in high-UV environments, this is the category to start with.
Modern water-based formulas have improved significantly and can perform well on treated lumber when the product is specifically rated for exterior use on pressure-treated surfaces. They dry faster than oil-based options and clean up more easily. The key is choosing a product designed for the task — general-purpose interior formulas or products not rated for high-humidity environments are not appropriate here.
Solid stains and exterior paints sit on top of the wood surface rather than penetrating it. They hide the grain completely and offer the widest range of color options. Because they cannot flex as freely as the wood moves underneath them, solid coatings are more prone to peeling and chipping on horizontal surfaces. When peeling occurs, stripping and recoating is significantly more labor-intensive than refreshing a penetrating stain. Many experienced builders recommend against solid coatings on deck boards for exactly this reason.
A clear sealer primarily repels water. It does the job when moisture protection is the only concern, but it provides almost no UV protection without pigment in the formula. Over time, a clear-sealed deck will still gray and degrade from sun exposure. A semi-transparent stain that includes a water repellent in its formula covers both concerns at once and is generally the stronger long-term choice when the goal is to seal pressure-treated wood while also maintaining its appearance.
Good results come from preparation, not rushing. Get everything in place before starting.
Most stain manufacturers recommend application between 50°F and 90°F with no rain expected for 24 to 48 hours after application. In San Antonio, avoid staining during the hottest part of a summer afternoon. Direct sun baking the surface while you work causes stain to dry before it can penetrate properly, leaving a sticky, uneven finish. Early morning application — when temperatures are lower and surfaces are in shade — consistently produces better results.
With properly prepared wood and the right product on hand, the application process is straightforward. The goal is to maintain a wet edge, work in manageable sections, and avoid letting the product dry before a full board is covered.
Always apply stain along the length of the boards, not across them. Brushing or rolling with the grain keeps distribution even and prevents visible lap marks. On a deck, work one or two boards at a time from one end to the other rather than cutting across multiple boards.
Most penetrating stains are designed for a single coat with the excess wiped away before it dries. A second coat may be warranted if the wood absorbed the first coat heavily and the surface still looks thin — but check the product label first. Applying a second coat over a fully cured surface without manufacturer guidance can create adhesion issues.
For semi-transparent oil-based stains on new treated wood, one generous coat worked into the grain and then wiped back is usually sufficient. Let it sit for the time indicated on the label — typically 15 to 30 minutes — then wipe away anything that has not soaked in. Puddles left on the surface to dry will become sticky and uneven.
Fences, railings, and posts follow the same process but benefit more from a brush than a roller. A brush forces stain into joints, corners, and end grain cuts where moisture tends to enter first. Pay close attention anywhere two boards meet and wherever end grain is exposed.
Dry to the touch and fully cured are two different things. A stain may feel dry within a few hours but still need 24 to 72 hours to harden completely and be ready for regular traffic and weather exposure. During that window, keep foot traffic off horizontal surfaces and protect the finish from rain if possible.
If rain does hit before the finish has cured, blot away standing water and allow the surface to continue drying. Minor spotting from early moisture contact usually disappears as the product finishes hardening.
A properly maintained pressure-treated deck with a quality semi-transparent stain generally needs refreshing every two to three years. Heavy-traffic surfaces in full sun may show wear sooner. Shaded structures or fences with limited foot contact often go longer between applications.
Watch for these signs that a new coat is due:
Catching these signs early means a straightforward clean-and-recoat — a manageable weekend project for most homeowners. Waiting until the wood is deeply weathered means more aggressive cleaning, possible sanding, and heavier product use to achieve an even result.
Painting is possible using an exterior latex primer designed for treated wood, but most outdoor professionals steer away from it on horizontal decking surfaces. Paint sits on top of the wood rather than penetrating it, which means moisture that gets beneath the film through cracks or fastener holes has nowhere to escape. The result is usually bubbling and peeling within a few seasons. A solid-color deck stain handles movement better than traditional paint and is a more appropriate choice when a consistent opaque finish is the goal.
Staining over a peeling surface will not hold. The old finish has to come off first. Strip the surface using a chemical deck stripper rated for the existing finish type, scrub and rinse thoroughly, then apply a brightener to prepare the bare wood. Once the surface is clean and fully dry, apply the new product from scratch.
Many quality stains include a water repellent built into the formula, which handles sealing as part of the same application. If you use a penetrating stain that does not include water-repellent properties, a separate sealer coat may add value. Read the product label to confirm what is and is not included before layering products that may not be compatible with each other.
Staining a modest fence or a small deck is well within reach for most homeowners who take the preparation seriously. Larger or more complex structures — multi-level decks, pergolas, or covered outdoor kitchens — raise the stakes on every step, because mistakes on a big surface are proportionally harder to fix.
Prestige Deck Builders of San Antonio has worked with pressure-treated lumber across a wide range of project types and understands firsthand how San Antonio’s climate affects finish performance over time. Whether the question is about product selection for new construction, timing the first coat on freshly installed boards, or evaluating whether a structure is ready for refinishing, hands-on experience with local conditions makes a real difference in the answers.
Getting the staining process right comes down to three things: patience during the dry-out period, thorough surface preparation, and choosing a product suited to exterior wood in a demanding climate. Rushing either of the first two steps is the most reliable way to end up with a finish that fails before it should.
Done correctly, properly stained treated wood adds real years of service life to a material that was already built to last. That is a straightforward payoff for the effort — and a deck or fence surface that holds up to whatever the next San Antonio summer brings.
Copyright © 2026 Prestige Deck Builder. All rights reserved.